Noticing a mysterious puddle or a persistent musty smell in your bathroom or kitchen can be incredibly frustrating. Often, the culprit is water leaking through your tiles, a problem that starts small but can quickly escalate into a major headache. Water has a sneaky way of finding the tiniest weaknesses in your tiling, leading to damage you cannot even see until it is too late. But you do not have to live with the worry. Understanding why it happens and how to fix it is the first step to a dry and healthy home. Let us explore the world of tiles, grout, and waterproofing to stop that leak in its tracks.
Why is Water Leaking Through My Tiles in the First Place?
Water leaking through tiles is almost never the fault of the tiles themselves. Tiles are incredibly hard and non-porous. The real weakness lies in the defenses behind and between them. Think of your tiled surface like a sports team. The tiles are the star players, but they cannot win the game without a strong defense. That defense is made up of two key players, the grout and the waterproofing membrane. If either of these is weak, injured, or missing, water will easily score a goal against you. The most common entry points are cracked or crumbling grout lines, failed sealant around fixtures, and perhaps most critically, an absent or improperly installed waterproofing layer. In many older homes, wet areas like showers were built without any waterproofing at all, relying solely on the tiles and grout, which is a recipe for disaster over time.
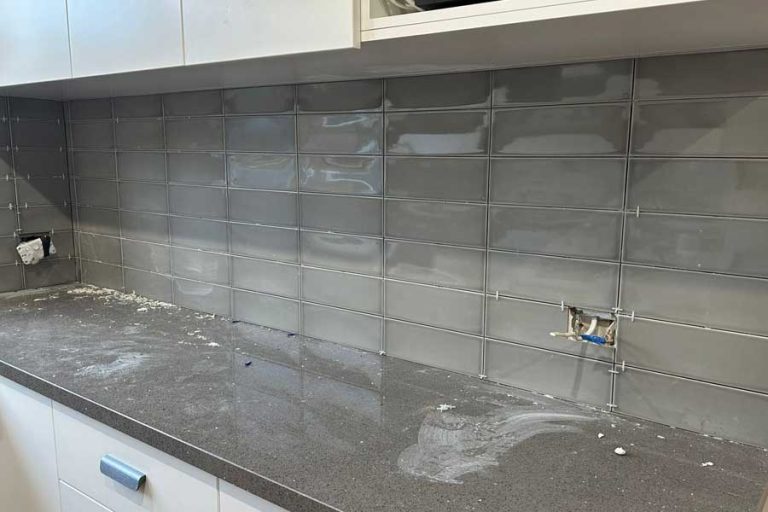
The Critical Role of Grout in Preventing Water Leaks
Grout is the material that fills the gaps between your tiles. While it looks solid, standard grout is actually slightly porous, meaning it can absorb water over time. Its job is not to be completely waterproof but to direct water towards the drain and protect the underlying structure from most splashes. However, when grout cracks, discolors, or begins to crumble away, it opens the door for water to pour through. Daily use, cleaning with harsh chemicals, and movement in the floor or walls can all compromise your grout. Checking the condition of your grout should be your first step in any leak investigation. Is it still solid and intact, or can you easily scrape it away with a fingernail? If it is soft or missing, you have found a primary suspect.
What is Waterproofing and Why is it Non-Negotiable?
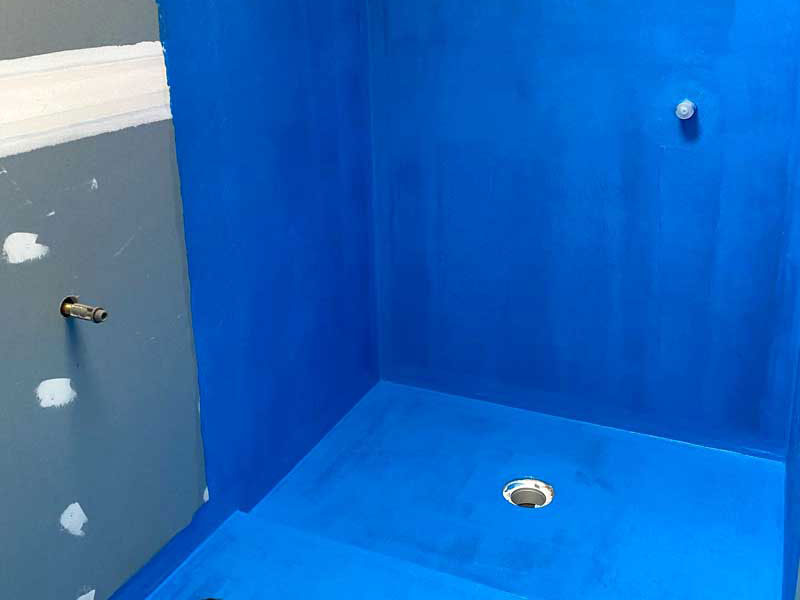
If grout is the first line of defense, then the waterproofing membrane is the fortress wall. This is a continuous barrier, usually a liquid-applied or sheet-based material, that is installed beneath the tiles and on top of the substrate, which is the base layer like concrete or cement board. Its sole purpose is to stop any water that gets past the grout from going any further. In a properly constructed shower or wet area, this membrane is what keeps the water contained and channeled into the drain. Without it, water that seeps through the grout will be absorbed by the underlying wood or wall materials, leading to rot, mold, and structural damage. Modern building codes require waterproofing in wet areas for this exact reason. A lack of effective waterproofing is the single biggest cause of major leaks behind tiles.
How to Find the Source of a Tile Leak
Pinpointing the exact source of a leak can feel like detective work. Start with a visual inspection. Look for cracked or missing grout, especially in the corners and where the wall meets the floor. Check the sealant around the base of the toilet, the shower valve, and where the shower door meets the tiling. Next, you can perform a simple test. Place a plug in the shower drain and let a small amount of water accumulate on the floor. Mark the water level and wait to see if it drops. If it does, the leak is likely in the shower base or drain area. You can also try drying the area thoroughly and then running water from the showerhead over different sections of the wall one at a time to isolate the problem. Remember, the leak may appear in a completely different location from where the water is entering, so be prepared to look for clues like soft walls or floors in adjacent rooms.
DIY Repair for Minor Grout and Sealant Leaks
If your investigation reveals that the problem is isolated to damaged grout or old sealant, you might be able to handle this repair yourself. The process involves removing all the old, compromised material. For grout, you will need a grout removal tool to carefully rake out the old lines to a consistent depth. Be sure to wear safety glasses for this. Once the old grout is gone, vacuum out all the dust and debris. Then, mix your new grout according to the manufacturer instructions and apply it with a rubber float, forcing it firmly into the joints. After it begins to set, wipe away the excess with a damp sponge. For sealant, remove every bit of the old silicone with a sharp blade or scraper, clean the area with rubbing alcohol to ensure perfect adhesion, and then apply a new, continuous bead of high-quality bathroom sealant. Smooth it with a tool or your finger for a perfect finish. Allow everything to cure fully before using the shower again.
When to Call a Professional Tiler for Help
While grout repair is a manageable DIY project, issues with the waterproofing membrane are a different ballgame. This is not a surface level fix. If you have ruled out grout and sealant problems but still have a leak, or if you notice significant softening of walls or floors, the problem is almost certainly underneath the tiles. Repairing a failed waterproofing layer requires the expertise of a professional. A qualified tiler will need to remove the existing tiles in the affected area, assess the damage to the underlying structure, repair any rot, and then install a new waterproofing membrane before re-tiling. This is a complex job that must be done correctly to prevent future issues. Investing in professional tiling services for a waterproofing repair is not an expense, it is an investment in the long-term health and value of your home. It ensures the job is done to industry standards, giving you peace of mind.
Preventing Future Water Leaks Through Your Tiles
An ounce of prevention is worth a pound of cure, especially when it comes to water damage. The best way to prevent leaks is to be proactive. Make a habit of inspecting your bathroom and kitchen grout and sealant every six months. Look for any hairline cracks or gaps and address them immediately before they get worse. Ensure your bathroom is well-ventilated during and after showers to remove excess moisture from the air. Avoid using overly abrasive cleaners on your tiling, as these can wear down the grout over time. If you are planning a new bathroom or kitchen installation, or a major renovation, never cut corners on waterproofing. Hire a reputable professional who understands the critical importance of a properly installed membrane. Using high-quality materials and expert tiling services from the start will save you from enormous hassle and cost down the road. Your home is your sanctuary, and protecting it from water damage is one of the most important things you can do.